1. Introduction
1.1 OGC Standards
1.1.1 Web Mapping Service
1.1.2 Web Feature Service
1.1.3 Web Coverage Service
1.1.4 Web Processing Service
1.2 CAAML
1.3 INSPIRE
2. Standards in action
2.1 Prepare data and toolkit
2.1.1 Manage the data
2.1.2 Design the CAAML schema
2.2 Build CAAML with GeoAvalanche
3. Main Chapter
Start the environment
Start components
For running through the steps of the tutorial It is supposed to have a working Kubernetes cluster which serves web applications from an IP address of your host machine.
At the moment the only component that needs to be deployed outside of the cluster is the GeoAvalanche server which is not yet Docker-ready. We can compile it and deploy into an application container like Tomcat.
Preliminary checks
If you are running minikube for a local instance of kubernetes cluster then following these steps:
- Start minikube
minikube start- Check the status
minikube statusthe result is something like
minikube: Running
cluster: Running
kubectl: Correctly Configured: pointing to minikube-vm at 192.168.99.100
our host IP address will be 192.168.99.100
- Configure the shell for Docker
eval $(minikube docker-env)PostGIS
At this point starting an instance of PostGIS is quite simple with a docker command and some configuration parameters for it:
docker run -p 5432:5432 --name caaml-db -e POSTGRES_PASSWORD=geonode -e GEONODE_DATABASE=geonode -e GEONODE_DATABASE_PASSWORD=geonode -e GEONODE_GEODATABASE=caaml_data -e GEONODE_GEODATABASE_PASSWORD=geonode -d geonode/postgisImportant notes are:
- The server will be available on port
5432of the host - The master use will be
postgreswith passwordgeonode - Our spatial database for CAAML is named
caaml_data
PGAdmin4
Let's start also an utility to work with the previously created database caaml_data:
docker run -p 54321:80 --name caaml-pgadmin4 -e PGADMIN_DEFAULT_PASSWORD=geonode -e PGADMIN_DEFAULT_EMAIL=admin@caaml.org -d dpage/pgadmin4
Important notes:
- The PGAdmin4 application will be available on port
54321of the host - Login to the console can be done with username
admin@caaml.organd passwordgeonode
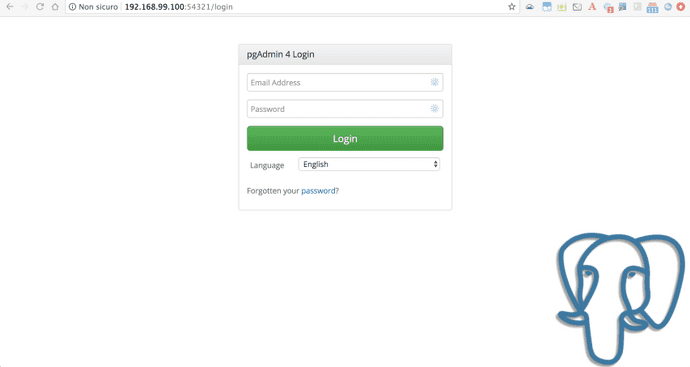
Check the connection
Login to the console:
You can then add a new connection by right-clicking on Servers, then choicing Create and Server:
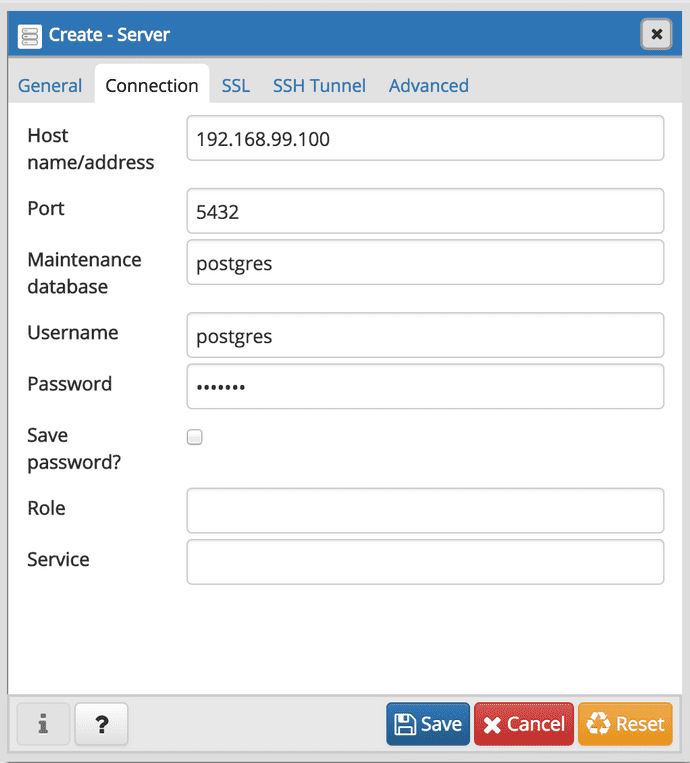
Fill the connection form with the values for accessing the database and give it a name i.e. caaml_tutorial then click the Save button.
# connection parameters
Hostname: 192.168.99.100
Port: 5432
Username: postgres
Password: geonode
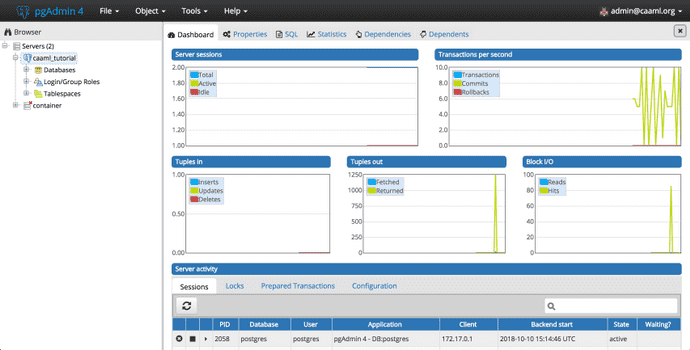
We should see something similar to this dashboard: